
I’ve seen countless of photos on FB and IG of this incredible web-like viewing platform surrounded with mountains and trees. It was with these photos that peaked my interest of visiting Manila despite the infamous traffic and stress that comes with it. A visit that would take me to the Masungi Georeserve in Rizal.
When the opportunity of finally experiencing this hike as a side trip to one of our annual travels with friends, I just couldn’t say no.
Disclosure: We use affiliate links on this post. Please read our Disclosure Statement below. Thank you.
Table of Contents
What is the Masungi Georeserve
The Masungi Georeserve is a conservation program that aims to preserve large hectares of land in Rizal – a province in the Philippines located in the Calabarzon region. It’s a project that promotes eco-tourism, geo tourism and sustainable development.
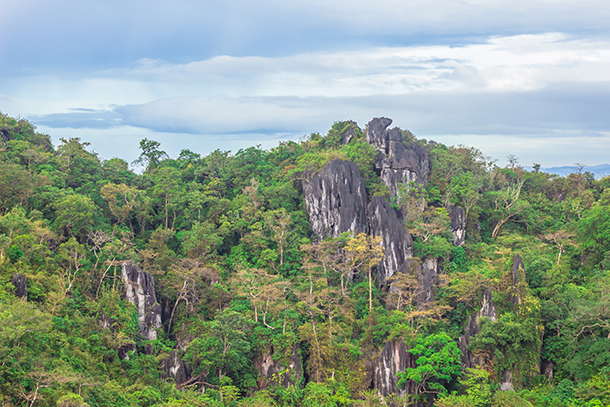
The Georeserve is home to sprawling limestone landscape. It is a characteristic that inspired the name Masungi which is derived from the word ‘masungki’ or spiked.
How to Book for a Hike Through the Georeserve
One thing that everybody should know is that Masungi has a rather strict policy on accepting guests. When I say strict, I mean not the conventional policies that we are used to for tours / activities.
For one, a visit to Masungi Georeserve is by reservations. Meaning, you won’t be allowed inside (or take part of the trail) if you have no confirmed appointment.
Also, the Georeserve does not allow tour agencies to book a slot for groups (though as what I’ve heard they are on the process of accrediting some). So better reserve directly to their website and wait for their confirmation email.
How Many Participants Are Allowed and How Much is the Fee
A minimum number of 7 persons and a maximum of 14 guests can be accommodated in one group. If the minimum is not reached, the price you’ll be paying will still be good for 7.
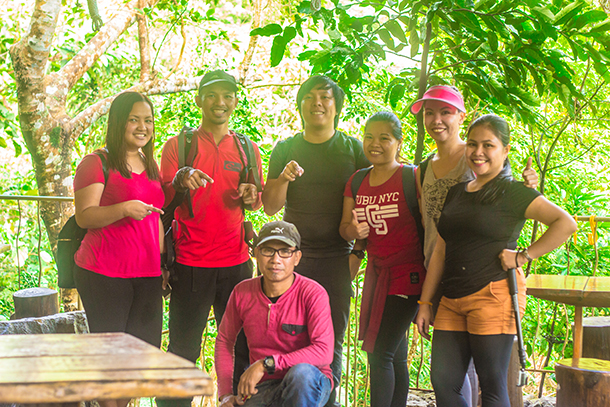
On our part, we were 6 in the group, so we had to divide the total amount between the 6 of us.
As of writing, the fee per head was at 1,500 Php (28.77 USD) for weekdays and 1,800 Php (34.52 USD) for weekends. We went on a Thursday.
Since we were unable to reach the minimum of 7, we had to pay the remaining person and divided it among ourselves which was 1,750 Php (33.56 USD) per person.
Aside from the minimum number of heads, private groups are encouraged as it easier to move in groups when people know each other on the trail.
We noticed that we were asked by the rangers and staff of the reserve how we were all related. I was with my good friends from college, the brother of my friend, and of course my husband.
How to Get to the Georeserve
We were booked for the very first scheduled of the day at 5:30 AM. It was pretty early and, honestly, I was a bit groggy on the way.
We were staying in Manila and had to leave at 3AM in the morning. The drive was around 1-2 hours.
You may check out our route below:
When you are Manila, late night and early morning is the best time to travel as the traffic is better. We arrived pretty early and the main gate of the Georeserve was still closed (they open at 5AM) so we had time to catch up some ‘Zzzz’ on the car.
What to Expect at the Georeserve
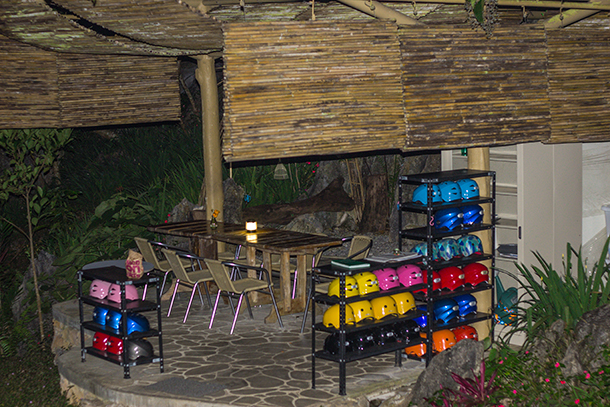
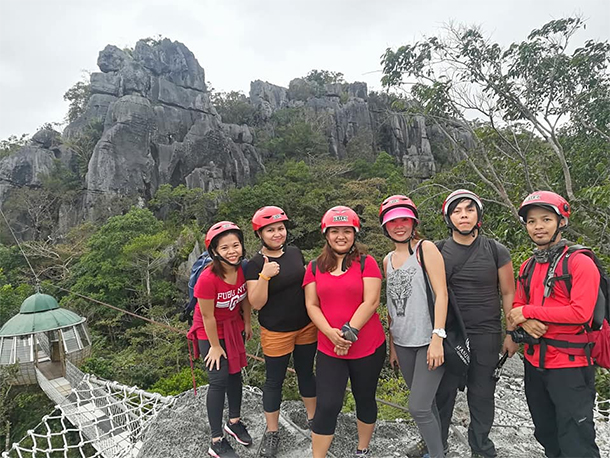
We were finally ushered inside and had to take a 5-minute walk to the ‘Silungan’ where we were briefed and given the safety gear (helmet).
The staff can also provide you with string bags for your small personal items. We requested one as my bag was not ideal for the hike (it was a small cross body bag).
The briefing was a pretty quick one where general guidelines and a short history of the Georeserve were discussed.
Once set, we were introduced to ‘Joy’, our Guide who was to accompany us during the trail.
There is a 30-minute interval between groups. I find it a good system as it allows our group a chance to enjoy it all to ourselves without being conscious of the next group waiting for their turn on every stop.
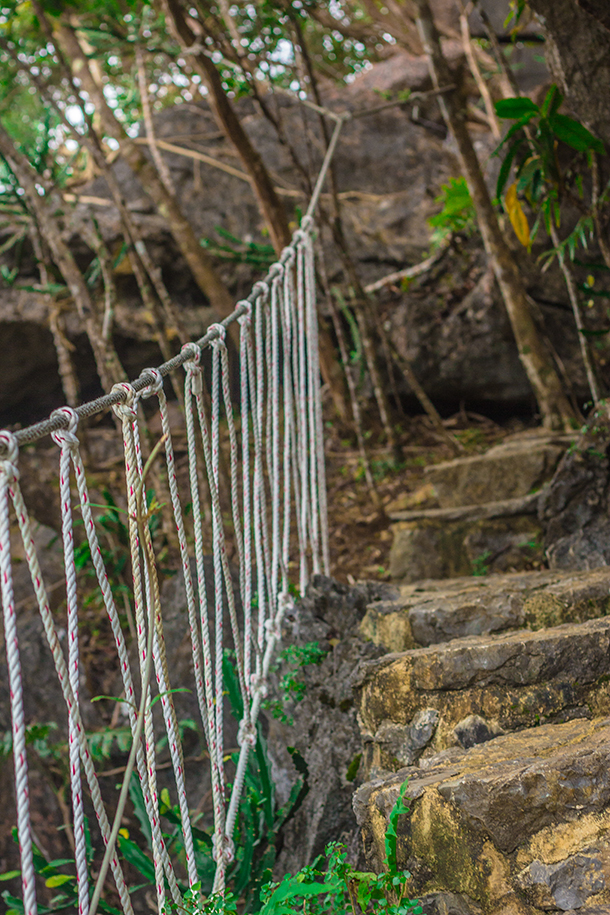
The trail is an easy one, helped also by the concrete blocks and stone trails created by the Georeserve. If you are used to extensive mountain hikes, this will be pretty easy for you.
Compared to my hikes to Mount Pulag, Osmeña Peak, and Mount Manuggal to name a few, the trail is very beginner friendly.
I had to take a quick break to catch my break, though. After all, my form of exercise at the moment since I gave birth is a short yoga sequence and carrying my baby. LOL.
All in all, there were a total of 9 major stops that we were brought to. It was punctuated with some short stops where the guide explained some facts about the Masungi Georeserve.
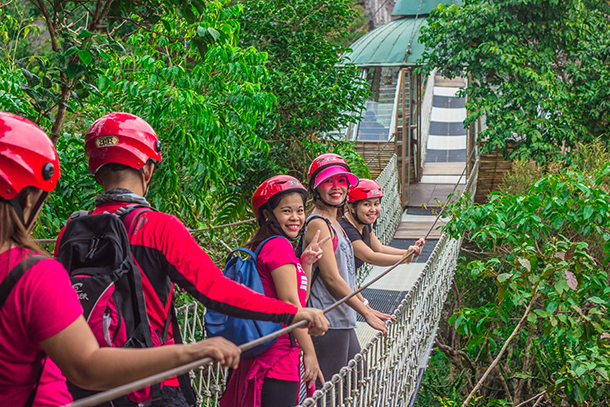
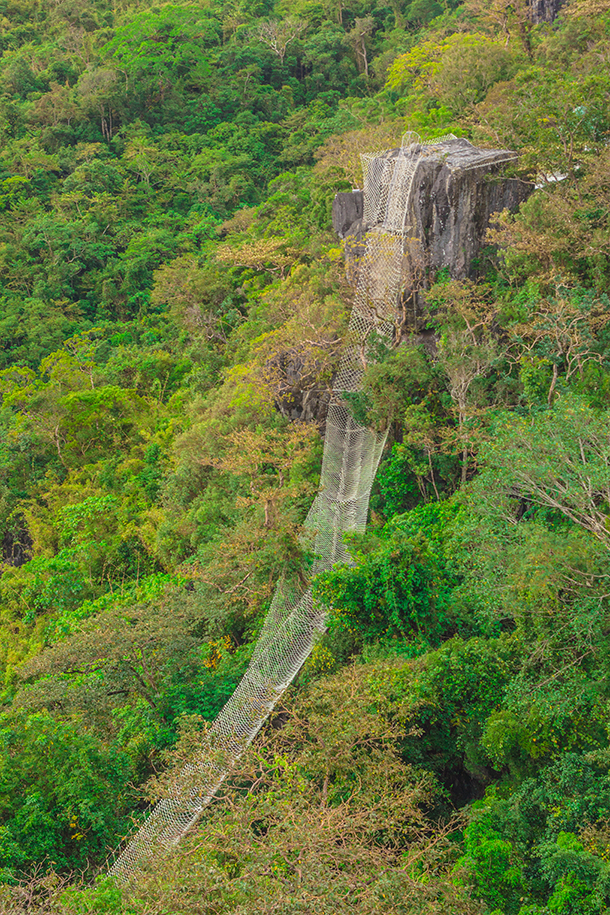
The Georeserve is dotted with several rope courses and hanging bridges all throughout the trail. They are made with industrial grade cables and ropes used in making buildings and ships and are perfectly safe. So no worries there!
We were very fortunate enough to meet the man behind the structures himself: Mr. Eric. The Sapot was named after him. 😉
It was still dark when we started out and I had to take my cellphone out for light (forgotten our headlamp which was so not like us at all. LOL). There was no light on the path walk so we had to rely on our personal light.
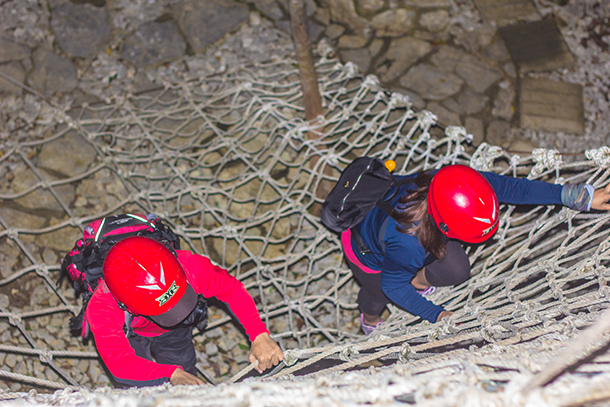
Our first taste of the rope course was a few meters ahead only. Good thing though that by the time we were required to climb it, daybreak was fast approaching and I could perfectly see the area.
Like I’ve previously mentioned, there were 9 major highlights on the trail, and some pretty significant ones too.
To give you a brief overview of our trail, below were the major stops (and a few minor breaks) that we went through during the trail:
Masungi Georeserve Trail Highlights
Silungan
The Silungan was our first stop during the trail. This is where we were briefed and given the safety gear.
I believe there were several Silungan at the receiving area as there were about 2 or 3 cottages like this as were walking towards the start of the trail.
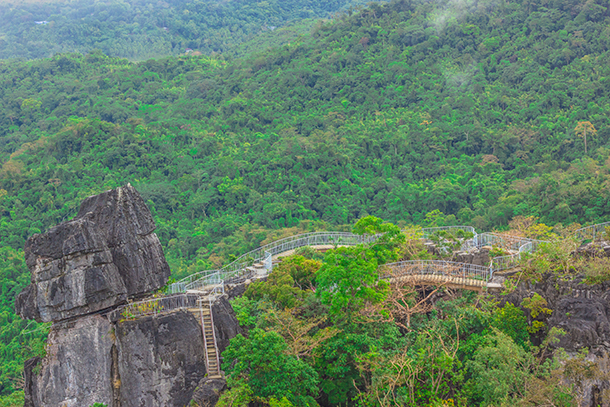
Sapot
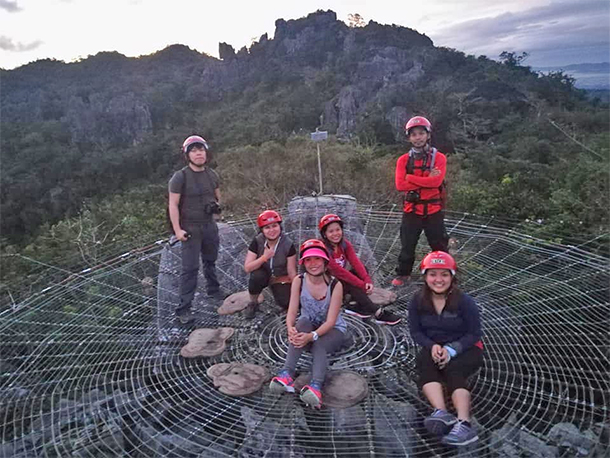
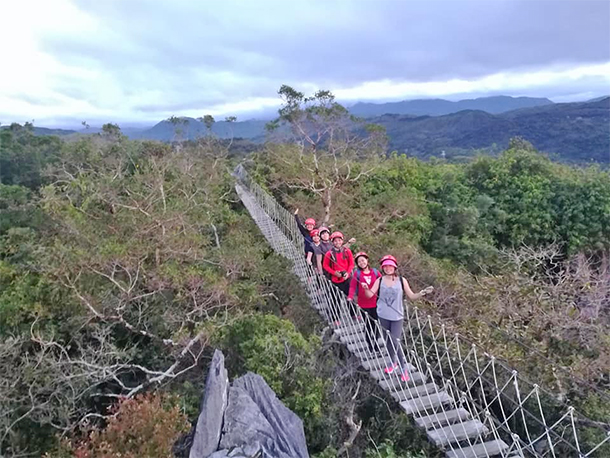
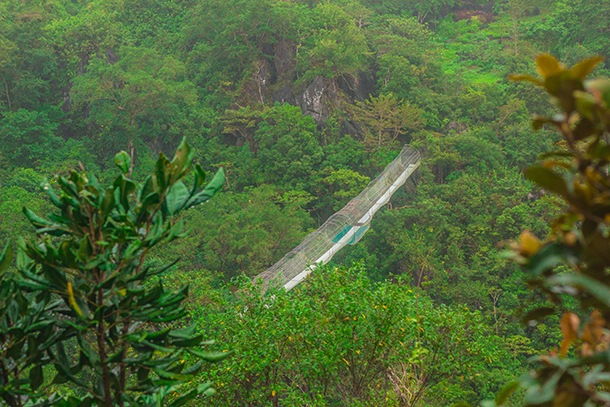
Finally. The web-like viewing platform: ‘Sapot ni Ric’. Among the many rope courses and hanging bridges in Masungi, this is definitely one of the most eye-catching and unique. The workmanship is very impressive too.
We saw some of the sunrise from this viewpoint and it was beautiful. I couldn’t find a more gorgeous and peaceful setting.
After the Sapot, we walked through a lovely bridge to the next stop, Haring Bato.
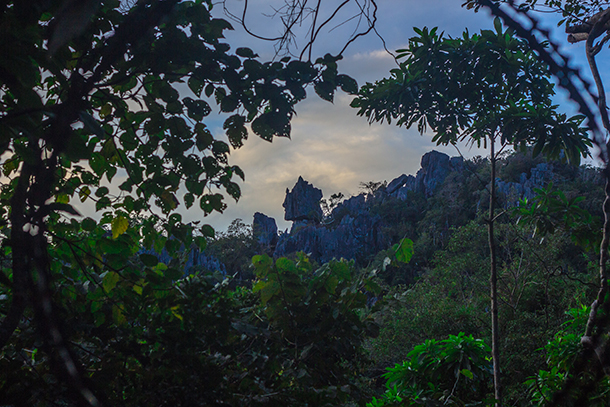
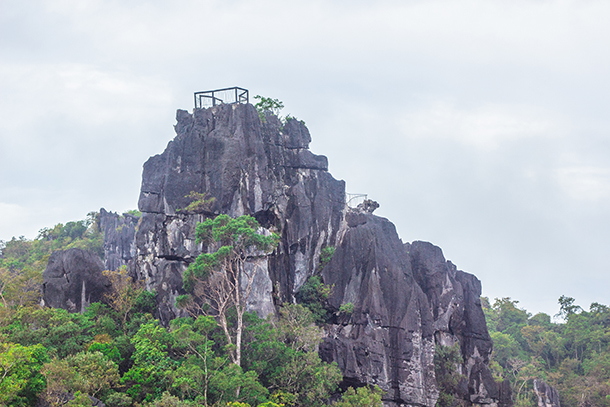
This unique rock formation is the inspiration of Masungi Georeserve’s logo and is considered to be one of the highest peak in the Georeserve.
From this point here, the rocks seemingly form a head-like silhouette of a man with a crown on his head. There was no trail yet to get to Haring Bato as per inquiry.
Following the introduction to Haring Bato we were ushered to the ‘Suutan’ or ‘entrance’ where the Meditation Walk will start.

What I love most about the Meditation Walk was that it allowed us a moment to commune with nature. We were not allowed to talk. Our task was just to listen to the chirping of the birds and the sounds of our footsteps on the pathway.
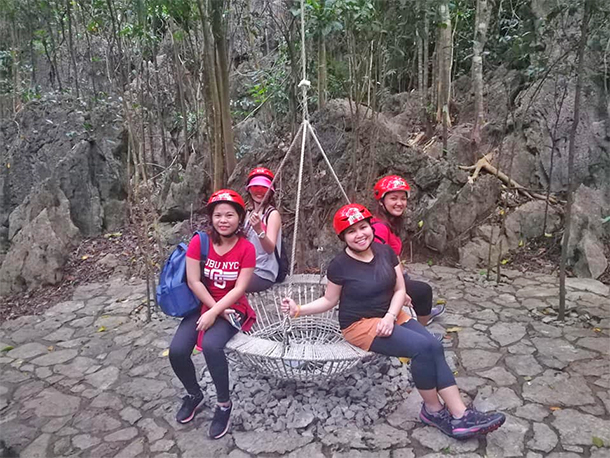
At the end of the trail of the Mediation Walk is a nice circular swing where we spent a few minutes happily sitting and going round and round like little kids. LOL.
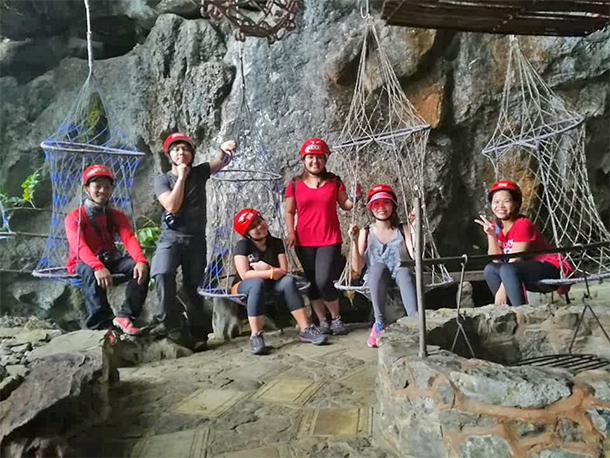
On we went again and ascended to another semi-enclosed area with a fire-pit at the centre. Here we sat around and enjoyed a couple of minutes rest as the hammock were pretty relaxing.
According to Joy, this is where the night trail (yup, you read it right, there are night trails in Masungi if you care to try it out!) gather round and have dinner (prepared by the Park Rangers of Masungi).
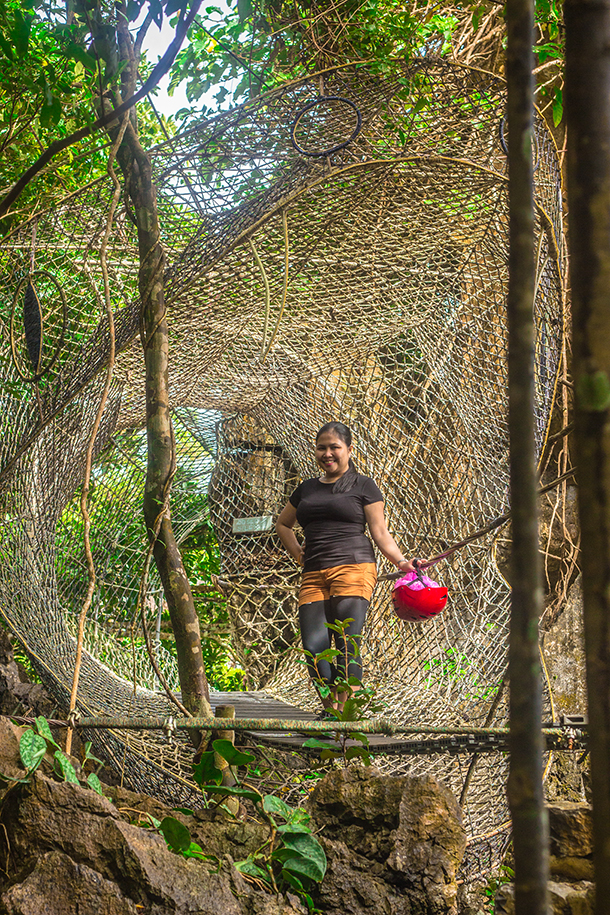
Ditse, Patak at Duyan
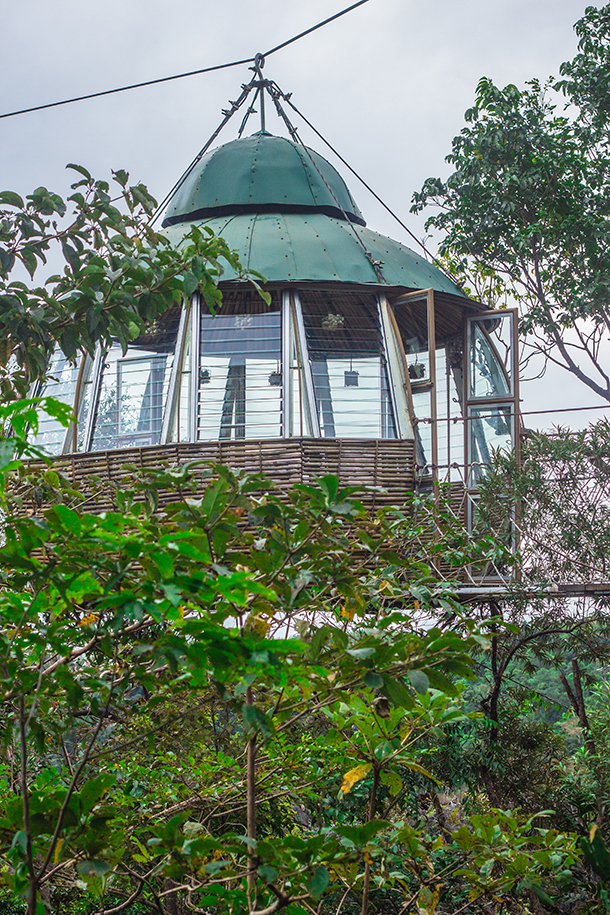
Our next stop was another interconnected cool rope course and an air house. The Patak – I believe it was called – was very lovely. We spent a couple of minutes enjoying the view and taking pictures (and a few videos too). The air house was very instagrammable!
We walked through the hanging bridge and went up another rope course and got some pretty cool views on top of Ditse.
From Ditse, we needed to climb down another rope course to get to the Duyan. Unfortunately it started to rain on our way down and we had to stop for a few minutes to let it pass and wear raincoats provided by Joy.
We did not get the chance to enjoy leisurely staying here as the rain was falling down pretty fast.
Yungib ni Ruben
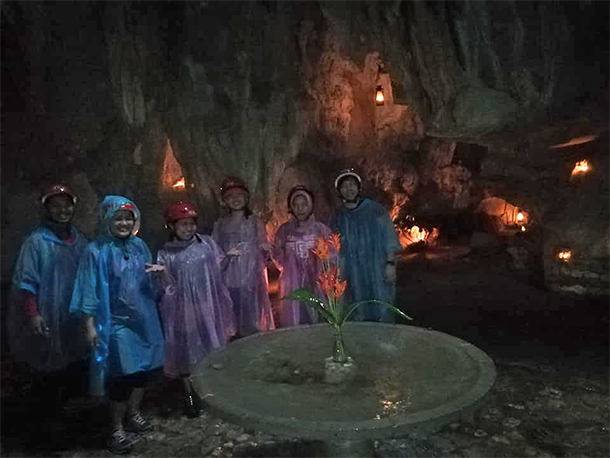
Just after the Duyan was the Yungib ni Ruben where we entered wet and felt relieved as we were finally out of the rain.
The lightning was poor when we went inside thus the low quality picture. Nevertheless we enjoyed our brief stay here with it’s concrete basin at the centre.
Oddly enough, this basin is what I’ve always imagined the stone basin in the Harry Potter and the Half Blood Prince book where Dumbledore drank the liquid substance to get locket will look like. LOL.
We also met the man who first discovered the Yungib (cave) during the hike: Mr. Ruben. Though we did not get a chance to take a photo with him. He was pretty busy during that time and we were just passing through.
Tatay
After the cave, we ascended to another interesting stop in Masungi: Tatay.
Tatay is the first and taller among the two peaks in the Masungi Georeserve. The Tatay is a natural sculpture and formation of rocks that seems to be piled on top of one another.
We spent a couple of minutes here taking in the view of the surrounding karst landscape.
Nanay
After Tatay, we took another hike to Nanay, the second peak that features five limestone rock peaks. Several interconnected bridges where built here for an easier access between the rock peaks.
What’s interesting about Nanay is that the two (2) large rocks at the top. At a glance, the rocks looks like they’ve just been placed there, near the edge and defying gravity.
Bayawak
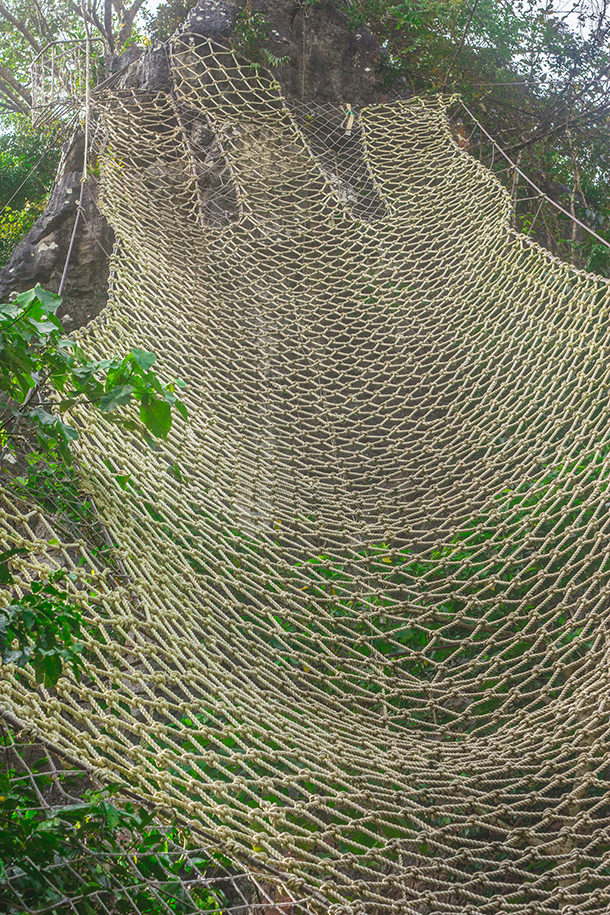
After the refreshing view from both Nanay and Tatay, we headed to one of the most challenging rope course in the entire Masungi Georeserve (at least for me): the Bayawak.
We were tasked to climb down a long stretch of rope (at the side of a tall rock edifice) with no harness – an exercise that would’ve been pretty easy if it was not drizzling and I was not wearing any rain coat over me. LOL.
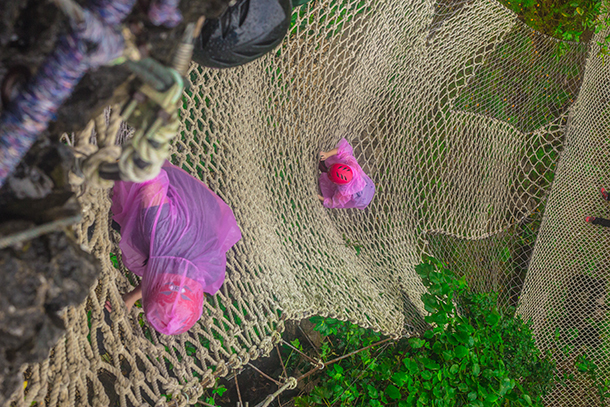
The rain coat was getting in the way of my feet – short girl problems. LOL. I had to secure it while climbing down. My shoes keep getting stuck to the rope too.
I had to climb down pretty slowly – though of course it was pretty safe/ I can feel the sturdiness of the material that I was holding on.
We climbed down by twos and felt pretty relieved when we reached the bottom. 🙂
Liwasan
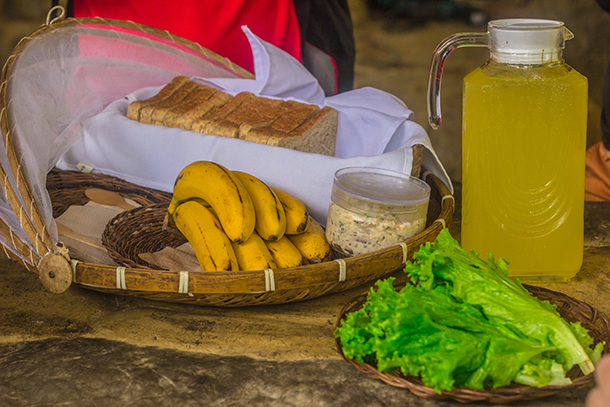
The Bayawak was our entry point to our favorite part of the trail: the snacks! LOL. We have not bought any light snacks with us when we started the trek so it was a pretty satisfying to eat fresh produce that the Masungi Georeserve prepared for us.
The Liwasan is situated on a valley-like area for relaxing prior to the final ascent. Rest rooms are available including polished wooden tables and chairs where guests can rest.
Sawa
After the delicious snacks of sandwiches and banana, we were finally ready to take our last and final stop of the hike: the Sawa.
Our guide, Joy, already went ahead of us while we were eating our snacks so this time, when we made our way through the bridge, we took our time enjoying the views and of course taking photos.
What’s really cute about the Sawa is the entrance where they formed it in the shape of a snake’s heard. Pretty cute, huh?
Masungi Georeserve Hiking Tips
What to Wear/ Bring
1. Non-slip Closed Shoes
2. Comfortable and Lightwear Clothing
3. Towel
4. Spare Clothes
5. Water (1 litre)
6. Light Snacks (i.e. crackers and chips. No meals allowed inside)
Reminders
1. There is an age limit of 13 years old and above.
2. Before starting the trail, be sure to take a restroom break as there are no other restrooms within the trail.
3. There are no trash bins in the area, so bring your trash with you (if you have any).
4. Floral, fauna and rock samples is not allowed to be picked inside the Georeserve.
5. Be conscious of your noise as you might disturb the wildlife and the general peacefulness of the Georeserve.
6. The trail can take up to 3-4 hours, depending on your pace.
7. Tipping Park Rangers are not allowed.
What I love the most about visiting Masungi Georserve (aside from majestic views and impressive rope courses) is the fact that the people behind it are passionate about nature.
They firmly stands with what they believe in – that is protecting the environment from mining and quarrying activities and illegal loggers.
Their efforts are pretty laudable – as you can see when you visit – how they have made such a great difference to the area.
Here’s a short video of our fun day!
Have you been to the Masungi Georeserve? What was your favorite spot? Share it on the comments below! We’d love to hear from you!
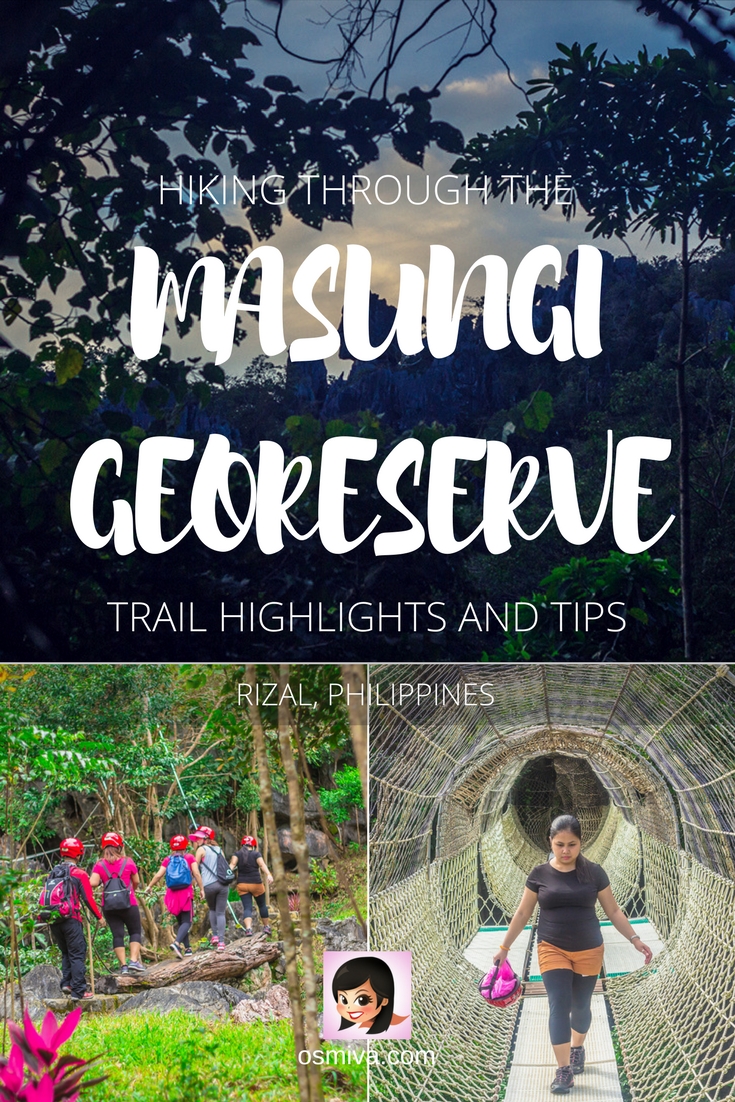
Like This Post? Pin It!
 |
 |
Disclosure: We are a participant in the Amazon Services LLC Associates Program, an affiliate advertising program designed to provide a means for us to earn fees by linking to Amazon.com and affiliated sites. Meaning, if you purchase any item by clicking on the link, I earn a commission at NO EXTRA COST to you. Thank you for reading the blog!
This guide is super detailed! It looks fun and something I would definitely love to do!
Thank you, Serena!
I love your posts on the Philippines! There’s so much diversity and places to explore away from the regular tourist trail. Thanks for sharing these beautiful spots 🙂
Thank you, Lisa! Glad you enjoyed reading it! 🙂
Absolutely amazing travel blog. thanks for sharing you great skills about traveling around the world. It’s just superb. Keep exploring more lovely destinations.
Thank you Sumit. 🙂
I have never heard of this place and now I am intrigued! Philippines is on my list, so hopefully I can get there in a year. What a great adventure!
Thank you Laureen! 🙂
wow what an incredible outdoor adventure! I bet you were wiped after all this! Im tired just reading about it
It was.. 🙂 Thank you for dropping by, Harmony!
Such a good article! I love trekking and the picture of the suspension bridge looks amazing! I will definitely check this location out.
Thank yo, Alice! 🙂
Fantastic post! I love the detail in this article and the photos – wow. I love hiking and getting back into nature and it is so good to see others enjoying the natural environment.
Aww.. Thank you Chantelle! Same here! There’s so much to appreciate in nature.. 🙂
A good way to spend a day 🙂 I love national parks, but not yet good with all climbing equipment. I would try this one, where everything is pre installed.
Thank you Alexander! It was indeed a great day to be outdoors (despite the rain. LOL). It was very organized indeed.. 🙂
This is so cool! I didn’t realise there’s a geopark near Manila! I will definitely have to save this for the next time, if I can talk somebody into going with!
You should Teja.. It was pretty cool to leave the hustle and bustle of Manila.. 🙂
I have never even heard of this place before, but it sounds absolute amazing 😍 Thank you for sharing your experience and all of your tips 💪
Awww.. You’re welcome, Louise!
This sounds and looks beautiful. I am not so sure about the seriously early start but definitely looks worth it
You can always book other schedules (or maybe try the night trail!) 😉
I never been to the Philippines but I should add it to my bucket list. This hike looks like an amazing adventure!
It was.. You really should visit this place!
Wow this looks like a great hike! I love all the fun built into it! Sounds like a great experience and something I would love doing as well! Thanks for sharing!
You’re welcome! Thank you for dropping by, Jacqueline! 🙂
It looks like such an interesting tour. I love the idea of having small groups in reservations, and spacing them out. I’m sure the experience was so much nicer not being crowded!
Agree on that! 🙂
looks beautiful, I love these types of experiences. I didn’t know the Philippines had this type of nature but I’d love to experience it when i visit!
I never heard of a georeserve before but it sounds like an awesome project and something we’d definitely love to visit. Especially if it promotes eco tourism and sustainable development! Raising awareness is definitely something more destinations should to!
Agree. I think one of the major pull on the georeserve is it’s advocacy on raising awareness on environment preservation. 🙂
This is awesome! I love hiking so much, but I tend to get overwhelmed sometimes as I want to look at EVERYTHING! I my husband and I are into birding and herping and then I am into flowers and plants. So I am always trying to look and take pictures of everything because I like to have a reference so I can go back and identify the species.
I would say the rope courses would probably be my favorite thing on this hike. It’s just different. It’s something I haven’t done while hiking. Hiking over bridges and going to the highest point at a hiking location is normally the norm for us. Great information on this!
Thank you, Chasa! 🙂
This looks amazing! I’d love to visit Masungi now and spend a day here. That web-like viewing platform looks like it’s out of Spiderman or something!
Agree! It was pretty amazing how it was conceptualised! 🙂
I must go here. The place looks amazing. It’s has so much nature. I love the pictures of Sapot ni Ric and Yungib ni Ruben,
I admint I’ve never heard of this place, but the vistas are incredible and there are so many things to do for the nature lovers.
This is so detailed! How did you take so many pictures while going around the course? Definitely somewhere I would love to go !
Thank you Amber! Definitely a skill! LOL. 😀 Seriously though, we took the trail at our own time (we were pretty much on schedule so the guide was not in a rush. 🙂 ).
Stunning photos and a fantastic read, what a fabulous adventure, looks like you had an awesome day out doing these activities. Will defiantly have to try a similar activity too.
That looks like so much fun and the landscapes are beautiful! Brace yourself for a very 90s reference but that’s how I would imagine Jumanji! 🙂
Wow! The Masungi Georeserve looks absolutely beautiful, I can see why you were tempted to visit on Instagram. I think those hanging bridges would freak me out a little, but in order you to get those views I guess you have to conquer your fears!
I’ve been visiting Manila periodically for over a decade now. In all those years, I never realised that there was something this awesome so close to the mad metropolis. But this may just be wishful thinking given I’m afraid of heights and some of those hanging bridges look really scary.
Wow, this looks amazing! I have taken up hiking just recently and I am still trying to find light trails for me to get experience on, but Masungi Georeserve looks like something that I would greatly enjoy! I would love to have little time with those incredible views. And I love the fact that all is so organized and with a limit of persons. Makes you feel safer. Hope you had a great time!
OH! that looks like fun! I first thought – “why are you wearing helmets” then I realized it isn’t just hiking its an adventure park and hike! The rock formations along the way are beautiful, and a great way to spend a day!
The Masungi Georeserve trail in the Philippines looks amazing. I liked that they are taking so many efforts to promotes eco-tourism, geo-tourism and sustainable development. All these places in the trail are just lovely and full of thrill. I will love visiting here, whenever traveling to the Philippines.
I’m sure you’ll love it Suruchi!
This is something I would really enjoy — a nature walk, a hike, a ropes course, and a private tour all in one! In fact, my entire family would love this — I think it’s wonderful that so much care is taken to protect the Georeserve and its beautiful surroundings.
This is a beautiful way of exploring a georeserve. Adventure clubbed with nature is a thrilling experience. I would love those ropeways and those tiny caverns. I agree, that basin does look like the Harry Potter one. Or atleast how I thought of it. Cheers
Thank you, Ami! 🙂 Hahah.. We do have the same imagination then! 😉
Those Limestone peaks look so amazing! I was in the Philippines recently and although I tried to cover as much ground as possible in 10 days, I obviously did not even scratch the surface. I have been planning to go back because I know there’s a lot more to see ans do. Masungi Georeserve is yet another place I haven’t even heard of and would love to include it my places to visit on the next trip (next to Siargao and Batanes). Thanks for the information about making a reservation in advance or they won’t allow you inside. I will, of course, go with a group, it’s always the best way to attempt such hikes!
Wow, this is so cool. That picture where you guys are sitting on the spider web rope was insane!
Nice one! This looks reaaaally fun. I’d love to do a hike like that. Just need to brace myself.